This comprehensive guide will demystify autoclave control panels, clarify common settings, show you how to customize cycles for different loads, and provide practical troubleshooting advice. Whether you are new to autoclave operation or seeking to optimize your processes, this article will equip you with the knowledge needed to succeed in the competitive world of medical device distribution.
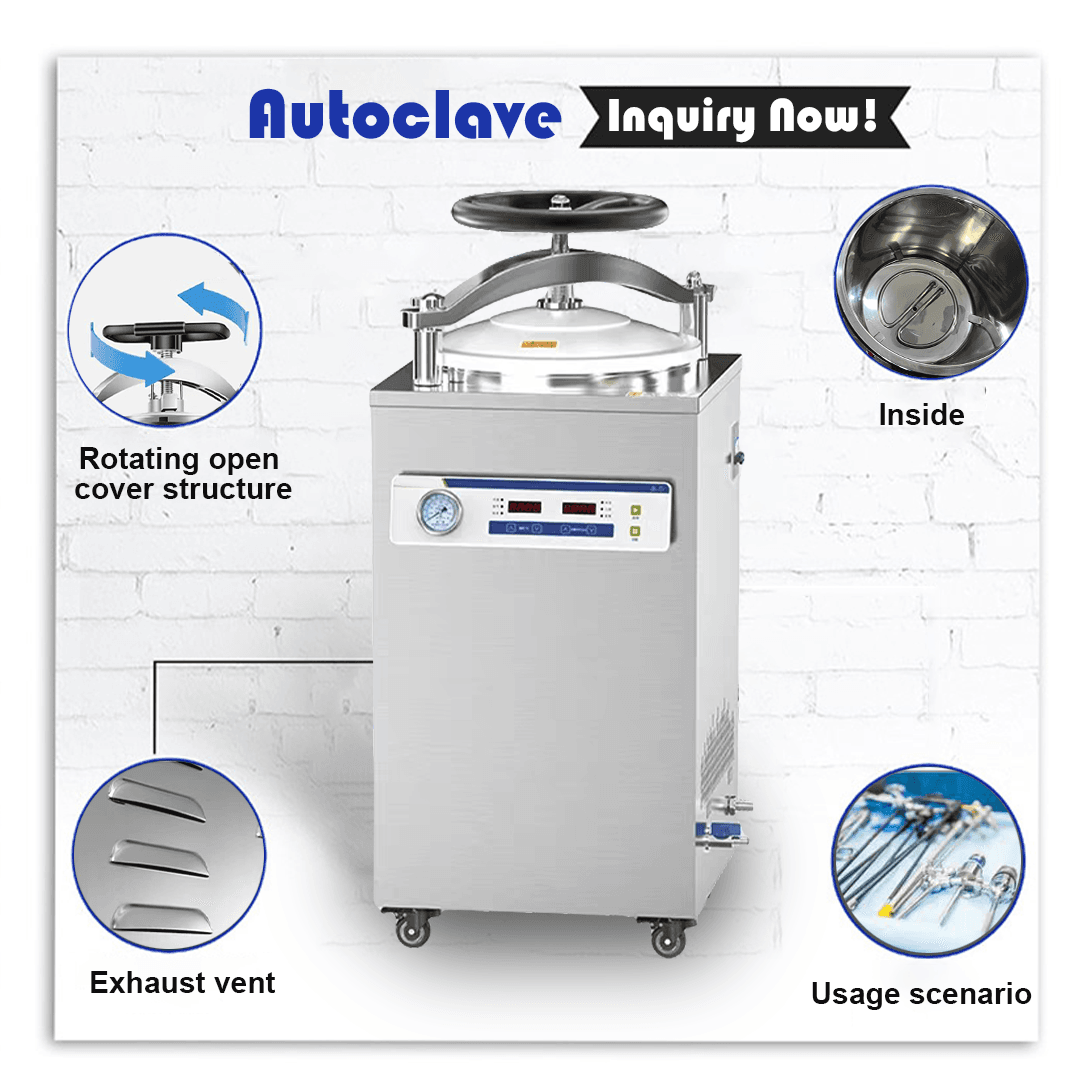
The control panel serves as the central command station for operating any autoclave. The control panel enables operators to choose various sterilization cycles and modify parameters while also allowing them to track cycle progress and access built-in safety options. Digital interfaces have become standard in modern autoclaves although certain models maintain traditional analog controls.
The power switch activates or deactivates the autoclave.
The Cycle Selector provides users options to select standardized sterilization cycles such as instruments, liquids, and waste.
The Temperature Display feature provides readings for both the present chamber temperature and the desired target temperature.
The pressure gauge displays both the existing and desired chamber pressure levels.
The timer component enables users to establish and exhibit the time span of the sterilization sequence.
The Start/Stop Button enables the user to begin or end the active sterilization cycle.
The Door Interlock Indicator system verifies that the door remains locked during the initiation of each cycle.
The alarm lights notify the operator about errors and hazardous situations including low water levels or excessive pressure.
The cycle progress indicator uses visual or digital elements to display which phase the system is currently in (heating, sterilizing, exhausting, drying).
Digital Panels provide advanced functions combined with programmable cycles and data recording capabilities. These systems provide intuitive operation while delivering precise control and documentation capabilities needed for facility operations.
Analog Panels: Use physical dials and switches. Despite their reliability these panels provide limited flexibility and necessitate manual monitoring.
The knowledge of essential settings ensures both safety and optimal performance when operating an autoclave. The sterilization result depends on each setting which requires adjustment based on the load and application specifics.
Typical Range: 121°C (250°F) to 134°C (273°F)
Higher temperatures decrease sterilization time for heat-resistant products while lower temperatures protect sensitive materials.
The standard operating pressure range is 15 to 30 psi (pounds per square inch).
Steam achieves sterilization temperature by raising water’s boiling point through pressure.
The duration of typical sterilization cycles ranges from 3 to 60 minutes based on the load type and the temperature used.
Adequate duration during a sterilization cycle destroys all microorganisms present. Big or complicated loads require extended processing times.
In this cycle, steam forces air out of the chamber to sterilize solid items that remain unwrapped.
Pre-vacuum (High Vacuum) sterilization targets wrapped or porous items by evacuating air before steam application to improve penetration effectiveness.
The Liquid Cycle enables the sterilization of liquids while maintaining control to avoid boiling over.
Waste Cycle: For decontaminating biohazardous materials.
The drying time prevents wrapped instruments and textiles from remaining damp after sterilization to protect against contamination and corrosion.
The Delayed Start feature enables users to plan sterilization cycles outside standard operational hours.
Data Logging keeps track of operational settings to ensure traceability and meet compliance standards.
User Authentication: Restricts operation to authorized personnel.
Tailoring sterilization cycles appropriately guarantees thorough sterilization while safeguarding medical instruments and materials.
For Solid Instruments, use gravity cycles at either 121°C for 30 minutes or at 134°C for 3 to 10 minutes.
Pre-vacuum cycles provide improved steam penetration for wrapped instruments.
The sterilization of liquids requires using liquid-specific cycles at reduced temperatures for extended periods.
Choose drying cycles that last longer to keep textiles from remaining damp.
Plastics and electronics require lower temperatures and shorter durations during processing.
The choice of cycle should be guided by both the load type and manufacturer specifications.
Modify the time and temperature settings based on the material of the item and its level of contamination risk.
Ensure optimal drying duration for wrapped items or textiles to prevent them from becoming recontaminated.
Insert chemical indicators inside packaging to verify successful steam penetration.
Sterilization effectiveness for critical loads should be periodically verified through Biological Indicators.
Maintain comprehensive records of each cycle by documenting parameters and load contents along with the operator details and indicator check outcomes to ensure compliance and facilitate traceability.
The best autoclaves are not immune to experiencing operational problems. Efficient identification and resolution of control panel problems helps reduce operational downtime and ensures safety.
The Low Water message shows that the reservoir water level is too low. Refill with distilled water.
The door interlock feature remains inactive. Make sure the door is shut tightly and secured in place.
The failure to reach the required temperature or pressure level likely results from defective heating components, system leaks, or sensor errors.
The cycle may stop because of a power failure or user cancellation or due to an internal error. Restart the cycle after resolving the issue.
Verify that the autoclave’s power connection is secure and functioning properly.
Replace the door gasket when it shows signs of wear or damage to maintain a proper seal.
Only distilled or deionized water should be used to prevent scale buildup in the system.
Certain digital systems feature a reset option which enables users to eliminate small operational errors.
The user manual provides detailed information about error codes and recommended corrective actions.
Perform scheduled calibration checks for sensors and controls throughout their operational period.
Perform regular cleaning of the chamber, trays, and control panel.
Qualified technicians must inspect and maintain the autoclave following manufacturer guidelines through professional servicing.
Reach out to technical support or a certified service provider when troubleshooting fails to fix the issue.
For safety reasons, do not operate the autoclave when malfunction signs are present and never ignore its built-in safety mechanisms.
For a comprehensive, step-by-step approach to autoclave operation, see our Step-by-Step Guide: How to Use an Autoclave. To avoid common pitfalls, visit Common Mistakes When Operating an Autoclave.
Understanding how to operate autoclave controls and settings is fundamental to safe and effective sterilization in the medical device industry. By mastering the control panel, selecting the right settings, and customizing cycles for different loads, you ensure the highest standards of cleanliness and compliance for your clients.
Regular maintenance, accurate documentation, and a proactive approach to troubleshooting will keep your autoclave running smoothly and extend its lifespan. As a distributor, dealer, or procurement professional, your expertise in autoclave operation not only adds value to your business but also builds trust with your customers.
Temperature and time are critical for ensuring effective sterilization. Always follow manufacturer guidelines for your specific load.
Refer to the load type: use gravity cycles for solids, pre-vacuum for wrapped or porous items, and liquid cycles for fluids.
Follow the troubleshooting steps in this guide and consult your user manual. If the error persists, contact technical support.
Yes, most modern autoclaves allow parameter adjustments. Always validate new cycles with chemical and biological indicators.
Follow the manufacturer’s recommendations, but calibration is typically required annually or after any major repair.
Check our Step-by-Step Guide: How to Use an Autoclave e Common Mistakes When Operating an Autoclave para mais pormenores.
Ready to optimize your sterilization process or need expert advice on autoclave controls and settings? Our team is here to help.
Correio eletrónico: inquiry@shkeling.com
WhatsApp: +8618221822482
Sítio Web: https://autoclaveequipment.com/
Take your business to the next level—contactar-nos today for tailored solutions, product recommendations, and professional support!

Healthcare facilities must adhere to rigorous hygiene and sterilization standards without exception. Medical equipment distributors and procurement professionals must understand the tools that maintain standards to deliver value to healthcare

Maintaining sterile medical tools and equipment stands as the most important practice for preventing infections and ensuring patient safety in healthcare settings. Medical equipment distributors along with dealers and procurement

The fast-paced healthcare sector operates under strict regulations which demand that sterility maintenance stands as a primary concern to protect patient safety and ensure compliance with operational standards. Medical equipment

Sterilization equipment serves as an essential tool in healthcare settings to maintain cleanliness standards and protect patients. Medical equipment distributors together with dealers and procurement specialists need to know the

Autoclaves serve as essential components of sterilization processes in healthcare facilities through high-pressure steam to destroy pathogens on medical instruments and other materials. Medical equipment distributors and procurement specialists must

Healthcare environments must prioritize sterilization because it protects patients and staff by removing infectious pathogens from medical devices and materials. The autoclave stands out as one of the best tools